Peace family, I know we’re hardly out of summer, but if you’re anything like me and craft projects can sometimes take you a while to complete, now is the time to get started making Christmas stockings! Here is everything that I wish I’d known before starting one!
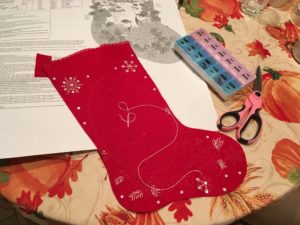
Have you ever made one of those beautiful, embroidered felt Bucilla Christmas stockings? I’ve wanted to make one for a long time, but I’ve always been intimidated. This past weekend though, after my friend, Katherine, shared her excitement about one that she is working on, I finally pulled out a stocking kit I’ve been holding onto and got to work!
Maybe you also already have a stocking kit at home. Maybe you’re thinking, “How will I ever make it through all of these steps?” (I took a very deep breath when I discovered that the kit I chose has 117 steps.) Or maybe, “How can I keep from messing up this expensive kit?” “Or, “Am I supposed to separate the embroidery floss into separate threads for the stocking kit?” (Yes, you are! I couldn’t find that answer anywhere on the internet.) Or, “How do you even pronounce ‘Bucilla’?” (I called the company and am happy to let you know, that it is pronounced, “Byu-sill’-luh.”) Even though I read all the way through the instructions before starting, I still found some things very confusing. Here are some tips I have learned from my mistakes, from google searching, and from my friend, Katherine!
Before you get started, there are several important things to know. One, you really can do this! Yes, I mean you! Two, follow the steps in order. Like a painting, you start with the things in the background and work your way forward, and due to the three-dimensional quality of the stocking, doing steps out of order can sometimes really put you in a bind. Three, don’t cut out more than one piece of felt at a time; cut only the piece that you are using for whichever specific step you are doing. The patterns are lightly stamped on the felt and are all labelled by number outside of their outlines, so there’s not really a way to tell what something is once you’ve cut it out. Obviously, the more complicated the design on the kit you choose, the more steps there are going to be, so Katherine suggested a simpler kit if you’d like something easier and faster to finish when you’re starting out.
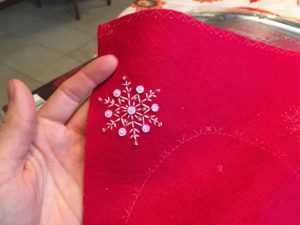
Besides the felt, your kit comes with an assortment of beads, sequins, and multiple colors of embroidery floss. Your kit also comes with two needles: a thicker, shorter one that is great for doing quicker, thicker embroidery, and a long, thin one with a smaller eye, which you will use to attach beads and sequins for making the gorgeous stocking of your dreams!
A tip that I’m sure others have also thought of (though I didn’t see this anywhere on the internet), was to use a daily pill dispenser for sorting the beads and sequins. The stocking instructions sheet suggested separating them out onto little plates, but I wanted a way to have my beads and sequins sorted into small compartments that I could open one at a time, which would be difficult to knock over, and which I could store and carry easily.
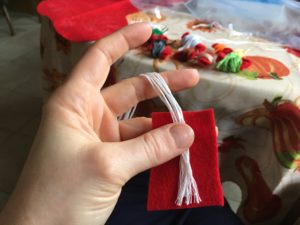
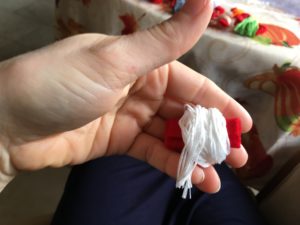
Another helpful preparation step, is to separate your embroidery floss out by color. The little cardboard embroidery floss spools that you can get at the craft store are great, but if you don’t feel like going to the store and just want to use what you have on hand, I used some scrap felt from around the stocking piece, cut it into little rectangles, and wrapped my embroidery floss around that. Wait to separate the specific numbers of threads that you need for your stitching as you need them.
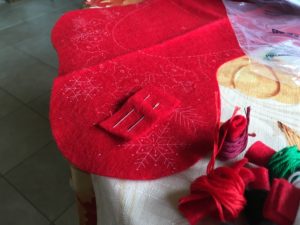
I keep my little spools in the plastic baggie that came in the kit with supplies inside of it (again, using the resources I already have.) My friend Katherine says not to worry about running out of embroidery floss, because the exact color identification numbers are listed on the instructions, so you can always order more. She also showed me an example of a kit she had in which the floss supplied was not a good color match to the felt supplied, so she bought some of her own embroidery floss (that’s rare, but it’s something to be aware of, so don’t panic if it happens.) You can also buy more beads (they are called Czech glass beads), and I have heard that the company is very easy to deal with if there is a big problem.
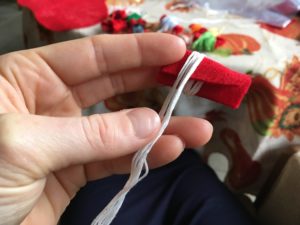
2. Gently wind the floss around, making sure not to stretch it too tightly, but also not leaving it so loose that it will fall off.
3. Keep winding until you have a nice, little spool!
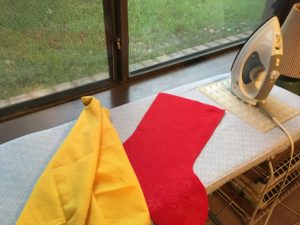
It’s also important to get the felt smooth before you start your project (the first time I started my stocking, in which I embroidered with the wrong amount of threads, there was a huge crease down the center that I couldn’t get to come out just by pressing it with my hands. After I undid all of my wrong stitches to start over, I ironed it.)
Iron any felt with packaging wrinkles face-down on a low setting. An iron that is too hot will melt and fuse the material. The directions also say to iron with a dry cloth covering the face-down felt, but a washcloth (which I first tried) is definitely too thick. I used a handkerchief, and an iron set slightly higher than the silk setting, and with good results!
(Some of the ladies whose comments I read online said that they iron all of the felt pieces in one go at the beginning, but I think I am going to iron my pieces as I need them, because I want to be able to keep the felt that I’m not working with folded and protected in the plastic bag.)
Now you’re ready to get started! Find a nice place to sit, make yourself a nice, hot cup of tea (or whatever you fancy,) and pat yourself on the back! Read through all of the instructions, and don’t give up! The bead needle can be difficult to thread, but it’s totally worth it (I’ve threaded as many as three threads onto it). As you look at the pattern and the symbol chart, be aware that certain stitches call for certain numbers of threads (I completely misunderstood what those numbers were for, and started my stocking using whole embroidery floss bundles (six threads) with all of my work; it was really difficult to pull through the felt, and absolutely impossible to string any beads or sequins! It took me about three hours to undo everything. But now you know, so you won’t do the same thing!) Meanwhile, for a stronger and prettier finished project, Katherine recommends using at least two threads any time that the chart recommends using only one.
You can undo embroidery mistakes as you work, (and I have a lot of experience doing that, haha!) by holding the string taut on both ends with the needle flush in line with the thread, and pulling it backwards and up through the stitch holes until you’ve gotten back on the right track. You can also always think of creative ways to incorporate mistakes into your design.
Several techniques also make your stocking stronger. One lady online, named Peggy, recommends dabbing the knots you’ve made on the backside of the felt with Aleene’s clear fabric fusion glue each evening after you finish working, letting it dry over night; she also advises not to use white fabric glue, which sometimes bleeds into the front side or dries yellow. Another, named Elizabeth, likes to stitch in the spot where sequin will go in order to reinforce it, and then stitches it down twice by looping through it twice, though she advises not to do this on thinner, weaker felts like dark green sometimes is. Peggy also recommends tying half hitch knots on the back side of the felt after each bead or sequin/bead combination you sew, before going on to the next stitch, so that the thread does not become loose and saggy over time. In addition, people have varied opinions about what kind of stuffing is best; someone with doll-making friends recommends Fairfield brand 100% polyester fiberfill (she says you can find it at Jo Ann’s), while someone else recommends soft, cotton-ball type stuffing instead of the polyester kind. My friend Katherine, on the other hand, says she has used anything she can get, including left over felt scraps.
When it’s finally time to finish your stocking, you can trace a piece of felt and stitch it to the back of the front piece before sewing the supplied front to the supplied back, so that toys and things don’t get hung up in the strings (this is what Katherine’s family does). A lady named Kathleen suggested using plastic bag material for the lining, in case your stocking holds gooey or melting-prone chocolates, candies and so on.
My friend Katherine has a lot of experience, and she says that once you are comfortable making stockings, you might even enjoy making a kit where you buy some of your own felt on the side and trace the pattern onto it in order to change certain things about the design (for example, a kit she is now making has snowmen with blue and green scarves, but she bought pink and white to do the scarves, because the stocking is for a little girl.) Katherine always likes to change at least one thing, so that the stocking is uniquely hers, but I think for me, at least for this first stocking, I will probably try to follow all of the steps as closely as possible! I also keep looking at the picture of the finished stocking, in order to stay motivated and excited! 🙂 I love the design I chose, because it reminds me of both my Grammie and my mom.
Peace family, if I can do it, you can do it, too! Let’s have some fun, make some beautiful things, and dream of stockings hung by the chimney with care. In the meantime, best wishes and happy stitching!

You must be logged in to post a comment.